

How Better Pictures Can Help You Become A More Successful Breeder
Are you struggling to get your breeding program noticed? Finding it difficult to make sales at the price you know your stock is worth?
Hands down, the most important thing you can do to get people interested in your breeding program, and to take you seriously as a breeder that is interested in improving the breed, is to make a real effort to showcase your goats through the proper type of pictures that show off their body and udder structures.
You don't have to be a professional goat photographer, or handler, but a little effort goes a LONG way here. Not only will great pictures help you with sales, but they will help you learn how to evaluate your goats more effectively and be a tool to help you continue to improve your program as you start having prior year's pics to review and seeing how your program is evolving.
It doesn't take much looking around to get the gist of the type of pictures you need. Basically a good side photo with the goat standing in an attractive pose and a good udder photo, with the udder trimmed and filled enough to show off its shape and attachments. Even if you dam raise, this is not a difficult thing to do.
Its ONE day out of the entire year, one day, that if you put forth this effort, ONE day, the pay off is more than worth it! You can have it be the day after a doe that is dam raising has her kids leave that were sold and she fills up, or take a day, further in her lactation to separate the kids for a day so she can fill up and really look good. Trim their udder area neatly with clippers and their body to show off their shape and then follow some of these tips to get great pictures!
Lighting
Even if you do everything else right, poor, or too harsh of lighting can ruin your pictures. Mid day sunlight will cast harsh shadows and pictures taken inside a dark barn or milk room will also come out with harsh shadows in your camera. You need lots of natural indirect light, or photography lights. Alternately, if you take your pics in the evening or morning outside, during the "golden hour", the light will bright enough, but not too harsh to take great outdoor photos.
Backgrounds
When you are planning where you will take pictures, being mindful of your options due to lighting challenges, consider what the background will be in the area you are considering. You'll want an area where you can take pics without other goats photobombing and/or getting in the background. This will also help keep the goat you are photographing stay more focused on the treat they are getting to stand nice. You'll also want an area with VERY short grass, gravel, mulch, concrete or similar. You want to show their pasterns/feet in the picture and not lose them in grass.
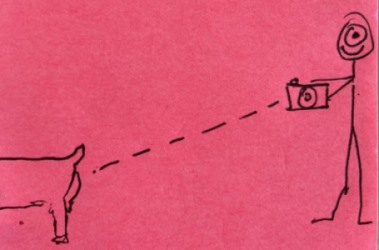
Get Low!
To take proper body pics of your goats, you are going to either need to squat way down, or get a mini tripod to setup your camera on. There are phone holders for tripods. You want to be taking pictures at the same level as they are. Your camera should be directly in line with the midsection of their body. You don't want to be angled above them angled down, bend those knees! ha... or take the easy way out and get that mini tripod (thats what I do now too haha).
Don't have help?
You can do it! I do all my pictures alone. I have a piece of wood above them that I clip them to, and a treat in front of them, put them there, try my best to setup their legs right if they haven't already and then I move out of the way and click away! If you are using a phone for your pics, take a video (in the high res/high quality setting) so you can go through it frame by frame and take screenshots later of the best moment/pose. Move VERY SLOWLY if you are taking video or the frame shots will be blurry.
If you are using a real camera, a tip is to put it on a mini tripod and get a remote shutter button so you don't have to jump into place each time and possibly miss the split second the goat was in the best pose. Put the camera on sports mode or rapid shooting mode so you don't miss a pose that the goat may have held for a split second (it happens! ha). Take LOTS of pictures!!! During a 5-10 minute photo session with a goat, I will often take about 200 pictures!!! Sometimes out of ALLLLLLL those, I only find ONE that is really good... more is better! Give yourself lots of options!
Here are two of my setups. One was for outdoor pics, and obviously the other one is for indoor pics. I've moved to using just the indoor one now because it gives me so much more flexibility as to when I can do pics. You'll notice I have several LED photography lights, and those are really vital to getting decent lighting indoors.
My Outdoor setup:
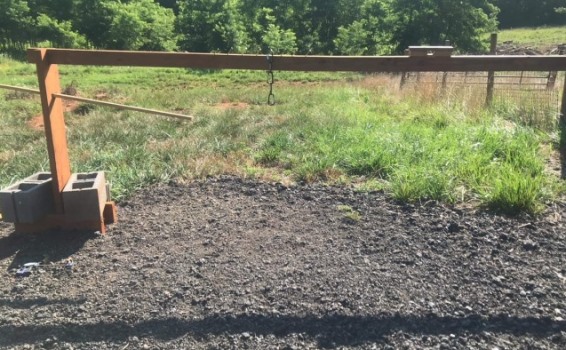
Here I would clip them to the wood piece above that you see and I would put a treat in a clear, shallow cup on the stick in front of them (stick and cup bottom had velcro). Alternately, I have also clipped alfalfa to the stick using a clamp.
Once I get down to their level, take the pics and crop the rest out, THAT results in THIS:
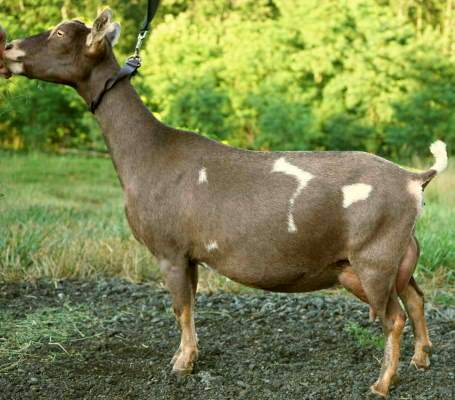
Take note at the level I had to be at to get this pic. My face/camera was directly in line with the middle of her body. Get low! :)
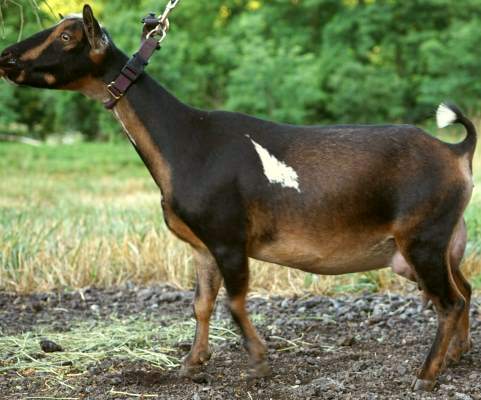
Sometimes even taking a couple hundred shots, they still never hit that perfect pose, but sometimes close to perfect is good enough! Do your best! Some will move more than others. This was the best I could do for Rosebelle! Her one front leg isn't placed rigtht obviously, but here she is still showcasing all her best features.
Here is my new indoor setup:
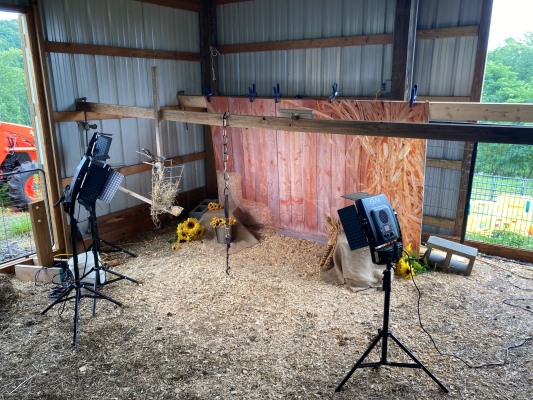
and once crop out all the stuff, THAT results in THIS:
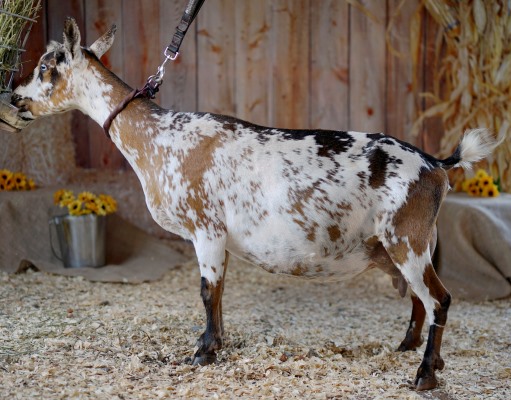
In this setup I utilize as much natural light as possible, but I was still having trouble with shadows since that area is in a corner. The LED photography lights solved those issues and now I have a well lit area that I can take pictures in anytime!
Udder Pictures
Great udder pictures are essential for sales and for showcasing what your breeding program is accomplishing. Having udder pictures will also help you SO much in later years, being able to go back and look at pictures from prior years to see how udders mature and change, and to see the progress your breeding program is making!
All the same elements hold true for udder pics that we went over for body pics, LIGHTING is especially important with udder pics. Harsh shadows can really do an udder great injustice!!! Where as great lighting can really highlight it and make it look great!
If you are doing the pics with a phone, do a (high res/high quality) video and MOVE VERY SLOW otherwise your frame by frame captures will be blurry! If you are taking the pics with a camera, take a LOT!!! Step back if possible. I like to be at least 5 -8 feet away and then crop my pic. This will help lens distortion issues if you are too close, which can make an udder look lower than it is. Either way, try different angles, barely changing. You don't want drastic angles. Try straight on, a little bit up, a tiny bit from the side... again, not drastic, just barely. Generally you're going to get the best pics from standing back and taking the pic at a slight angle down... like this...
Remember, you don't want to be at such an angle that you can't clearly see the teats. If you can't clearly see the teats (and not just the tips!), you are too high (and probably also too close!), GET LOWER. ha
I usually do udder pics two ways and then I go through them and pick the one I like best. When we are done with body pics, I will unclip them from the wood piece and let them have a two gallon bucket (a tall bucket won't work well) with grain in it. This way they are really focused on reaching in for that grain and won't hunch up their butt or tuck it under like they often do on the stand. Either way though, the one trick is you have to get their tail out of the way if they are tucking it down. USUALLY they don't tend to do it outside with the head in a bucket. On the stand is where mine hunch up, tuck under and put that tail straight down in the way!!! Thats where I have to step closer, hold their tail out of the way with one hand and take pics with the other. Not ideal, but better than having a tail covering the vulva and top of the udder to where udder height can not be determined.
Your udder pictures should always include the bottom of the vuvla so that udder height can be determined, so be sure not to crop that out!
Don't put all this work in and get less than satisfactory results because you don't want to put the time in for a show fill. Its ONE day. Trust me, just DO IT. So what is a show fill? How long should you fill? Well, that is going to depend on the doe herself and how much she is used to producing. The first time you ever do it, my suggestion is to try this exercise if you really want to learn and SEE the difference. Get your doe all ready with her udder trim... be sure to clip a large area around the udder too and any leg hair that might get in the way... then next day, do the fill. Take pics at 12 hours, then again at 16 hours, then again at 20 hours. Yes, they can go that long without issue! Occassionally a doe here gets inadvertently missed/skipped on the milking line... and I don't realize it until they come in for their next milking... at 24 hours full! And while YES, that is TOO full to be a true "show fill", my point is that it does them no harm. You will be AMAZED at the differences you see if you do this exercise once you review the pictures. Their udders can look so different with a true show fill! Take the time to impress yourself! You'll be a lot happier with the time you took to getting good pictures! **If your doe isn't able to get a really good fill in 24 hours, and you know they are capable of it by looking at pictures of their udders under previous ownership, its a management issue. Many things can affect production. Some things that can effect it negatively would be not milking them 100% out completely every time, not milking them 2x a day on a somewhat regular schedule, parasite load, and a huge thing that people really do seem to overlook is diet. Diet is so important if you want to see impressive production. For good production they have to be fed a diet that will support that. And its fine if you don't want to feed that way, but your expectations of the doe have to meet how you are feeding her. ;)
This doe was looking good while she was still clipped to the wood above, so I moved into position and started clicking away.... I am including this so you can get a better idea of how far away to be and what USUALLY ends up being a good (slight) angle (try different things!)... Take note you can see her entire teats! If you can't you're not low enough and/or too close!
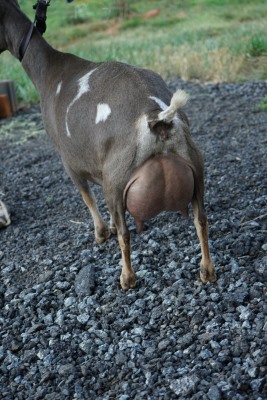
And so THAT becomes THIS once cropped and straightened (and brightened up):

What ever you do, do your best... the most important thing is to just DO THEM!!!!!
If you have a website, you'll have great pics to show off your herd there and if you don't have a website, start a FB page if you don't already have one. Create an album for your does and put those pics in there! Under each doe's pic, put her full name and pedigree in the caption area of each pic. This will help people review your herd while allowing you a simple way to showcase them!
Don't forget to add your farm name and location to your FB page, its a free, simple and quick way to drive business to you!
**********
Would you like to read more about Goats and Goat Care? Check out the
Articles/Posts Index.


 |
I live on the side of a mountain with 65
goats and 4 dogs. I make 100% of my living from my homestead. My
purpose is to "Inspire,
Encourage & Empower". Read more about my story here.... |
Top Posts
- Goat Basics
- -Goats: Basic Terms & Facts
- -Goat Housing needs
- -Goat Fencing requirements
- -Goat Care Requirements
- -What Do Goats Eat?
- -Why Registered Goats?
- New Breeder Resources
- -ADGA Genetics Tool
- -Tips For Goat Setup Pics!
- Videos and Tours
- -Virtual Barn Tour
- -Kidding area - Nursery Tour
- -Goat Milk Parlor Tour
- -Low Cost CIP System Hack
- Other Helpful Articles
- -Kidding Season Prep
- -Our Experience with ORF